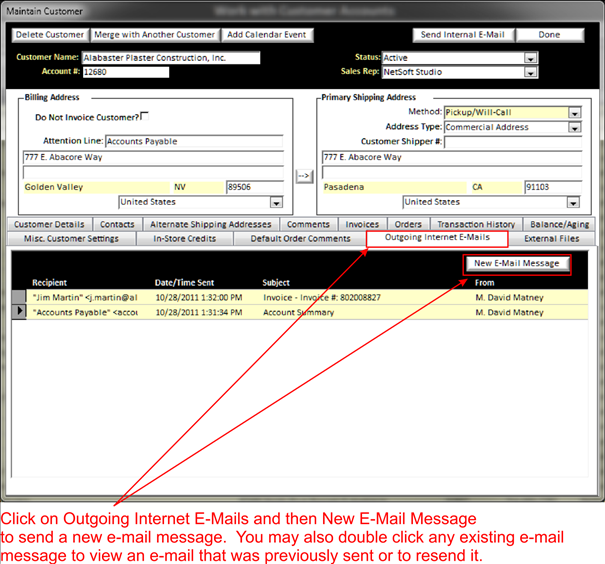
From the customer screen, you can click on the outgoing Internet E-Mails tab to open up the following display the window:

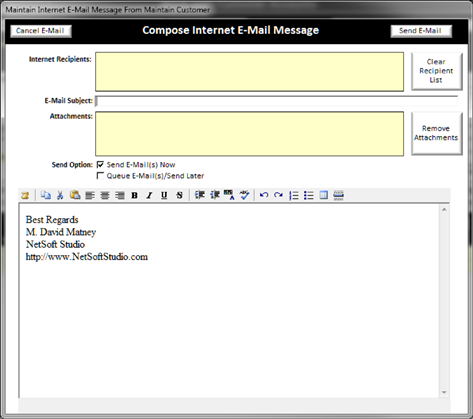
To send a new e-mail, simply click on the New E-Mail Message button. This will open up the following:

To enter who the e-mail will go to, double click on the Yellow Background Text Field area (See Understanding Yellow Background Fields) of the Internet Recipients box
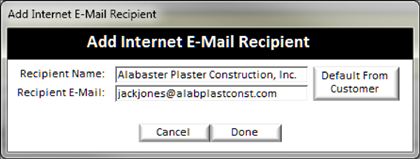
This will open up the following window:

Either click on the default from customer button to enter the information on the Add Internet E-Mail Recipient screen automatically or simply type in the information.
Note:
the Recipient E-Mail box will only auto-fill if an e-mail address is entered on
the Misc. Customer Settings Tab.
When finished click done. If you need to add another e-mail address, simply double click on the Internet Recipients Yellow Background Text Field (See Understanding Yellow Background Fields) again. You can repeat this process as many times as you like.
Also, when the Outgoing Internet E-Mails tab is selected you will be able to view all e-mails that you have sent previously to the customer . To view previous e-mails that have been sent, they are highlighted in yellow, double click on the message you want to review. You can also re-send the e-mail by clicking on the upper right, or click done to exit from the screen.
Note:
You cannot edit from the review screen as this is a record of what you have
already sent.